

I delivered a Test Driven Development workshop for a client last week in Ohio. It was a fun workshop, but man, the weather was brutal. The low the other night was below zero. The highs never made it above freezing while I was there. Brrrr.
Anyway, during the workshop we worked through TDD examples in C#, for the most part using MSTest, and leveraging the Microsoft Fakes framework in Visual Studio 2017. (See https://msdn.microsoft.com/en-us/library/hh549175.aspx.)
In addition to C# they also have a lot of JavaScript code, so I demonstrated how they could write unit tests in JavaScript to test their JavaScript code, leveraging Karma, Jasmine, and Chutzpah. The unit tests show up in Test Explorer, just like unit tests written in C# do. And setting things up isn’t very difficult and can be completed in just a few minutes.
So let’s take a look at how you can do it in your environment while we start to create a JavaScript library that calculates the score of a bowling game.
First some prerequisites
If you’re using Visual Studio 2017, node.js is probably already installed. If not, you can download it from here: https://nodejs.org/en.
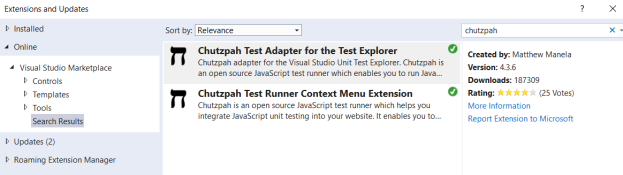
Download and install the Chutzpah .vsix packages. Use the Visual Studio Tools menu > Extensions and updates… then search for chutzpah as shown below. (More info about Chutzpah here: https://marketplace.visualstudio.com/items?itemName=vs-publisher-2795.ChutzpahTestAdapterfortheTestExplorer.)
Also download and install the Jasmine Snippet Pack from the Extensions and updates… menu option. (More info about Jasmine Snippets here: https://msdn.microsoft.com/en-us/library/hh549175.aspx.)

Now let’s create a place to hold our JavaScript library (the starting point of the system under test)
To give us a place for our JavaScript library, create a new empty MVC project / solution. (File > New > Project… then choose Web > ASP.NET Web Application (.NET Framework) template, and name it BowlingGameJS. Here are a couple of screenshots . . .

After you click OK, in the next dialog box, choose the Empty project template, then click OK.

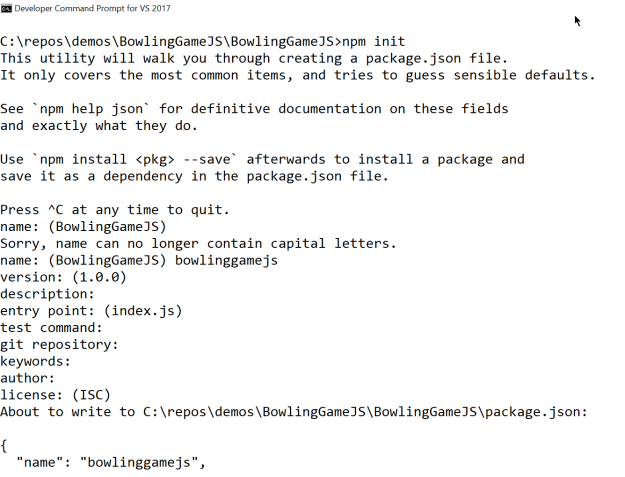
Now open a command prompt to your BowlingGameJS project’s folder and run the npm init command. Take all the defaults by pressing enter for each question. This will create a package.json file in your project folder. (Notice that you need to use lower case for the name: option.)
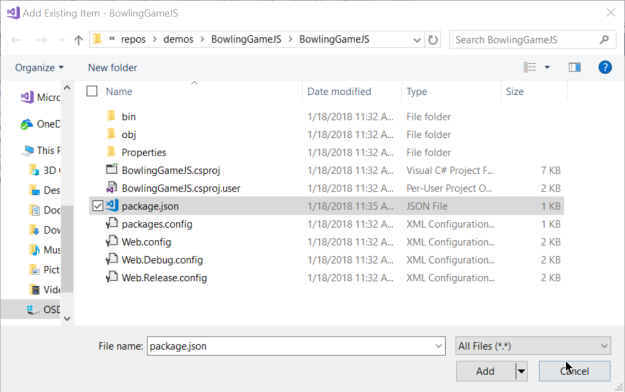
Switch back to Visual Studio and add package.json to your project. Right click on the project name > Add > Existing Item… > package.json, then click the Add button.
You should now see package.json in Solution Explorer.

Now that package.json is in your project, let’s open and configure it a bit more. We’ll update it to add package depenencies for karma, jasmine, and other necessary packages. We need to put these changes in the devDependencies section. As you’re typing, IntelliSense should pop up the latest version of each of the packages. The image shows the versions available as of this writing.

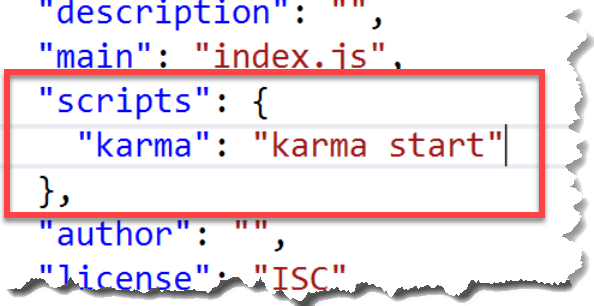
Also in package.json, change the “scripts” element to point to karma. It should look like this when you’re done. . .
Save package.json, then right click on it and choose Restore Packages. This should pull down the additional packages you added in package.json, but when I’ve tried this recently it hasn’t done anything.
To see if it did download the packages, open Windows Explorer to your solution’s project directory and see if the .\node_modeules directory has anything in it. If it does, cool. If it doesn’t, open a command prompt to your solution’s project directory and run npm install to install the node packages manually. It will take a couple of minutes for this to finish. (For more info, see: https://www.digitalocean.com/community/questions/after-running-npm-install-installs-with-no-errors-node_modules-is-empty).
Now with your command prompt open to your project’s directory run this command:
.\node_modules\.bin\karma init karma.conf.js
Answer the promps as follows. (Press enter to take the default, or tab to a new value as needed.
- Which testing framework? jasmine
- Do you want to use Require.js? no
- DO you want to capture any browsers automatically? [press tab until you see PhantomJS]
- What is the location of your source and test files? [leave empty for now. We’ll update it in a bit]
- Should any of the files included by the previous patterns be excluded? [leave blank]
- Do you want karma to watch all the files and run the tests on change? yes
Now add the karma.conf.js file to your project. (In Visual Studio, right click on the project name, and choose Add > Existing Item… and select karma.conf.js
Time to write some code?
Well, almost. Before we do, we still need to tell the tools where to find the class library and the tests you’re creating.
In Visual Studio, right click on the project name and choose Add > New Folder and name the folder Scripts. We’re going to put our library code here.
Do the same for our tests: Add > New Folder and name the folder Specs.
Now we need to update the karma configuration file to point to the Scripts and Specs folders. So in karma.conf.js, add the following
// list of files / patterns to load in the browser
files: [
‘Specs/*.js’
‘Scripts/*.js’
],
We also need to add a couple more reporters
// available reports: https://npmjs.org/browse/keyword/karma-reporter
reporters: [‘progress’, ‘dots’, ‘htmlDetailed’, ‘mocha’],
Tell karma about the available plugins
// notify karma of the available plugins
plugins: [
‘karma-jasmine’,
‘karma-ktml-detailed-reporter’,
‘karma-mocha-reporter’,
‘karma-chrome-launcher’,
‘karma-phantomjs-launcher’,
‘karma-coverage’
],
Tell karma to put all the results into one file
// configure the HTML-detailed-reporter to put all results in one file
htmlDetailed: {
splitResults: false
},
Time for some jasmine
Now let’s add the jasmine NuGet package to our project. In VS, right click on your project name and select Manage NuGet packages…
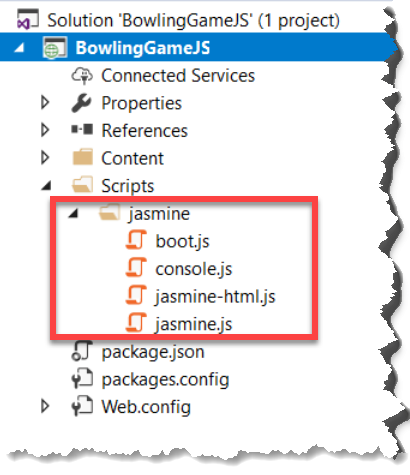
Under the Browse tab, search for jasmine, then tell the package manager to install jasmine. NuGet will add a jasmine folder in your Scripts folder.
Now it’s time to write some code!
Let’s create the jasmine test spec file for our bowling game calculator and the file for the bowling score calculator itself. First the test spec since we’re doing test driven development.
In Visual Studio, right click on the Specs folder > Add > JavaScript File and name it BowlingGameTests. (Visual Studio will add the .js extension for you.)
Testing 1, 2, 3. . .
Our first test is going to be a simple one. Let’s test to see if it can correctly calculate the score if someone rolls all zeros. Open BowlingGameTests.js and write the test spec as follows:
/// <reference path=”..\Scripts/jasmine/jasmine.js” />
/// <reference path=”..\Scripts/BowlingGame.js” />
describe(‘the bowling game’, function() {
it(‘correctly calculates gutter game’, function () {
// roll 20 zeros
for (i = 0; i < 20; i++) {
roll(0);
}
var result = score();
expect(result).toBe(0);
});
When you save the file you should see the test appear in the Test Explorer window.

If you don’t see the Test Explorer window, the easiest way to open it is to type test explorer in the Quick Launch box near the upper right of the Visual Studio UI. Then click on the Test > Windows > Test Explorer (Ctrl+E, T) item in the dropdown list.

Run the test by clicking on the Run All command in Test Explorer.
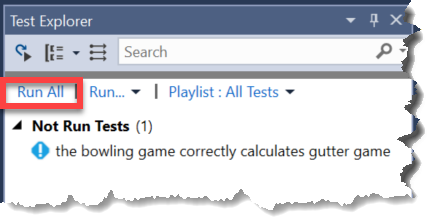
Since we haven’t started writing our system under test yet, the test is going to fail.

Developing 1, 2, 3. . .
So let’s fix that. Let’s write enough code in our system under test to satisfy the test.
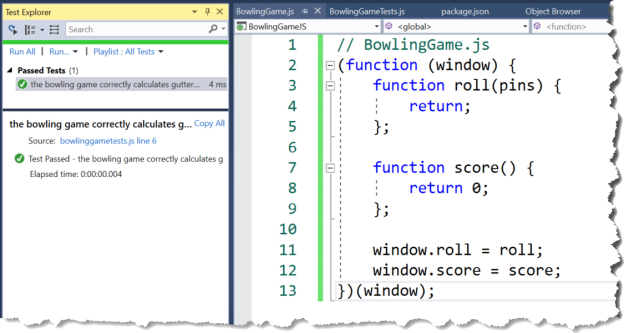
Right click on the Scripts folder > Add > JavaScript File. Name the file BowlingGame (VS will add the .js extension for you). Open the BowlingGame.js file and type the following code. (Don’t laugh at the code. Remember, we’re taking this a step at a time when we do TDD.)
// BowlingGame.js
(function (window) {
function roll(pins) {
return;
};function score() {
return 0;
};window.roll = roll;
window.score = score;
})(window);
Save BowlingGame.js, then click Run All in Test Explorer. The test should run and complete successfully. Yay!
Your JavaScript test environment should be working now. Congratulations!
So let’s add another test, this time to calculate the score of a game that has one pin knocked down on every roll. It’s the same drill as before: we first write a new test spec, run the test, then write the code to satisfy the test.
In the test spec file (BowlingGameTests.js), add this code after the closing }); for the existing it method. After you save your changes you should see the new test appear in Test Explorer. Run the test by clicking Run All.
it(‘correctly calculates all ones game’, function () {
// roll 20 ones
for (i = 0; i < 20; i++) {
roll(1);
}
var result = score();
expect(result).toBe(20);
});
The test will fail because we still return a hard-coded value for the score() function.
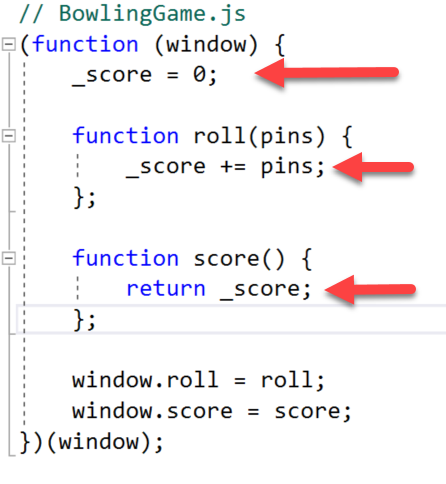
Let’s update the system under test then run the test again. Here’s a simple change that will satisfy both tests:
Here’s the current state of our BowlingGameTests.js file:
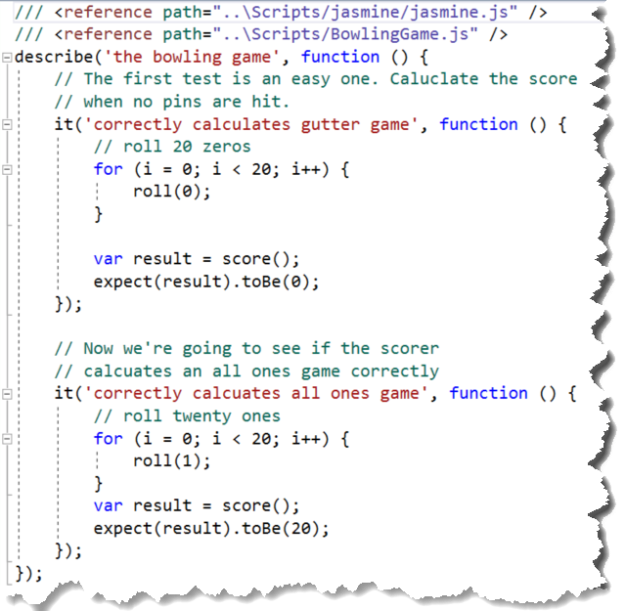
This is just the beginning
At this point you would continue writing tests with different criteria, such as a simple one that starts out with a spare then a one then the remainder all zeros; and then a test that starts with a strike then two ones then the remainder all zeros. With each new test you’ll write just enough library code to satisfy the test, making sure you don’t break any existing tests as you work. At some point you’ll also want to refactor your code (both the test specs and the system under test) to keep it maintainable.
Remember the TDD manrtra: Red, Green, Refactor.
There are other ways to write your JavaScript code, engines you could use to run tests against your code. But however you go about it, the bottom line is: unit test your code. Try edge cases. Write tests to make sure you’re satisfying the business requirements.
And have fun.
